

Wig technology has undoubtedly come a long way. Popularized by Black women in the spotlight, wigs have been a source of beauty and protection for years. While wigs were first meant to help us blend in, they now represent artistry and skill. Laying a lace front wig may seem daunting, but it takes some practice.
If you are new to wearing wigs with frontals and/or closures, you need just a few things to start:
- A wig with a lace frontal: synthetic or human hair, we don’t discriminate!
- A wig cap: one that is close to your skin tone.
- Foundation: powder or cream formulas work best. Select a shade that matches your skin tone.
- Adhesive spray: Got2b or Ebin should work!
- Blow dryer: this is optional but speeds up the installation process.
- Scissors or facial razors: the facial razor is a more precise tool, but both work just fine.
- Adhesive wig glue: with plenty of options on the market, be sure to read reviews and do your research!
- An elastic band: this essential sometimes comes with a wig when you purchase it. You can also find elastic bands in Walmart’s fabric section.
- Tweezers: you need these for wig prep.
- Hair wax sticks: similar to glue, several are on the market.
- Hot tools: you will need a hot comb, curling iron, and/or flat iron for styling purposes.
- Styling tools: combs, brushes, etc.
Here’s the 4-1-1 on how to lay your wig perfectly.
First and foremost, once your wig has been installed, it should be flat and natural. While the wig should be installed appropriately, it is still not natural hair, nor does it come out of a real scalp — do not stress about parts of your lace showing. If this is your first time or you are still a beginner, be patient with yourself. Expertise comes with practice; keep trying!
The steps to laying a lace front wig are simple and become easier with time. Keep scrolling to learn the technique.
Step 1: Prep your natural hair.
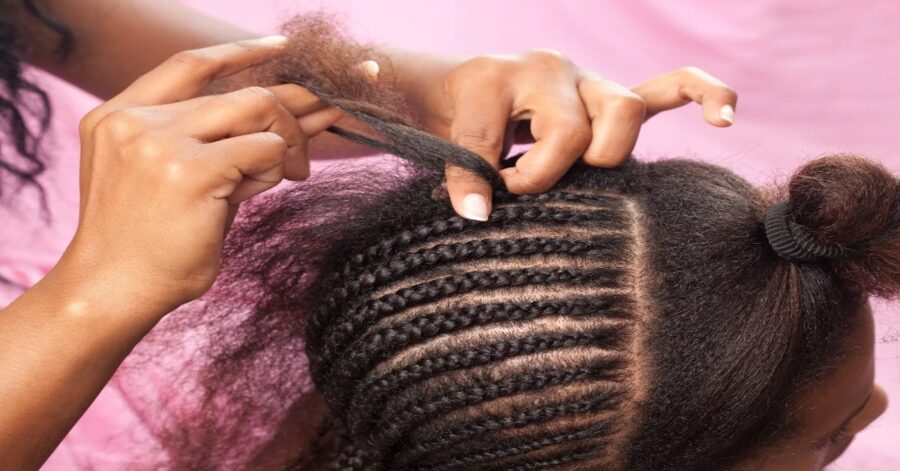
To achieve a flawless wig install, your foundation is essential. If you don’t have shaved or low-cut hair, kick things off by braiding your hair down with cornrows. This braid style provides your wig with a flat surface to lay on. That said, the more cornrows you have, the flatter your braid down will be.
Pro tip: Remember to wash and condition your hair before braiding it. Apply your favorite hair oil to your scalp to help keep it moisturized.
Step 2: Prep your wig.
Several things can be done to a wig before putting it on your head. For beginners, you want to make sure that you pluck your wig using the tweezers. Carefully pluck hairs from the hairline to make the wig look more natural. If the wig already has a part, pluck the part as well.
If you have a small head or your wig doesn’t fit snugly to your head, sew an elastic band to the wig to help secure it. Also, brush through the hair. Styling the hair beforehand is also an option. Bleaching the knots is also a part of wig prep but is optional.
Step 3: Apply your wig cap.
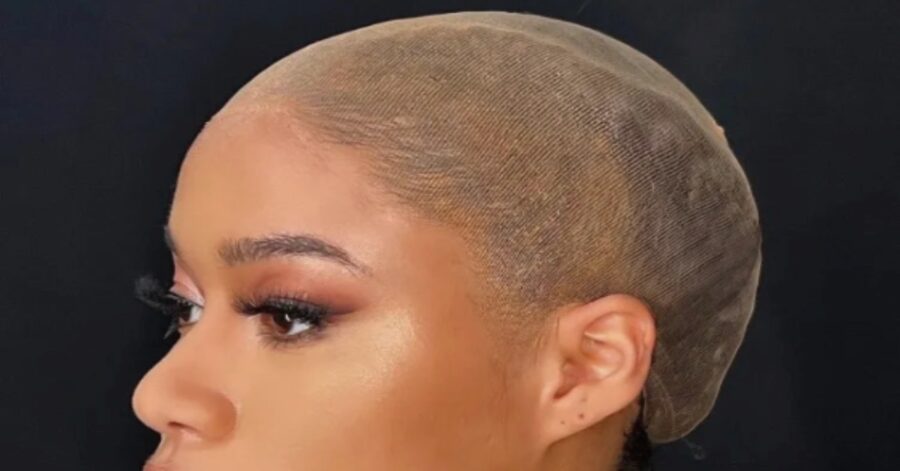
Next, you will put the wig cap on. Make sure it is snug and flat. You can use your ears as anchors to stretch the cap. Use an adhesive hair spray along your hairline to secure the cap. Let it dry down, or use the blow dryer to speed up the drying time. Once dry, use the scissors or facial razor to cut the excess cap.
Add some foundation makeup along the hairline of the cap so that the wig’s lace melts into your skin tone. Also, place the foundation where the part for your wig will sit.
Step 4: Install your wig!
Now, it’s time for the moment you have been waiting for! It’s time to put the wig on your head. First, using the adhesive wig glue, place a thin layer an inch or two up from your hairline (protect those edges, girl). Let the glue dry, but only some of the way. You want it to be tacky. Use the blow dryer to move faster. Repeat this two more times.
Now, place the wig’s hairline where the layers of glue sit. Press down to make sure the wig is in place. Grab your elastic band and tie it around the hairline. Leave the band on for at least 30 minutes. The longer, the better!
Once you take the band off, cut the excess lace using scissors or a facial razor.
Step 5: Style the wig.
You’ve done it; the wig is installed! Now, you need to style the wig. To get the wig ultra-flat, use the wax stick along the hairline and both sides of the middle/side part. Then, use a hot tool to press down and flatten the hair.
Use curling irons, flat irons, hot combs, clips, bobby pins, and anything else you can think of to style the hair to your liking!
What was your first time laying a lace front wig like? Let us know in the comments below.
Follow MEFeater on Twitter, Instagram, Facebook, and Pinterest for more beauty tips and updates!